
Presently, Xiaomi is performing excellent work by providing other premium smartphone makers with fierce competition. The Redmi Note 9 Pro Max from Xiaomi is one such device that makes a great alternative to many other Android-based smartphones now on the market. However, if you already own the handset, you could wish to unlock the bootloader and root your Redmi Note 9 Pro Max.
This tutorial will show you how to root your Redmi Note 9 Pro Max by first installing a custom recovery and show you how to officially unlock the bootloader on your smartphone. If this is your first time unlocking the bootloader and flashing, you must carefully follow the instructions.
The Pro Max edition of the Redmi Note 9 series, which consists of three smartphones in various price ranges, is the greatest of all of them. The business will add a few more products to the Note 9 line, according to recent rumours and leaks. The Redmi Note 9 Pro Max, however, will have the greatest appearance and design.
The device’s Qualcomm Snapdragon 720G (SM7125) CPU, which has eight cores, and Adreno 618 GPU, which supports it, will improve gaming and other multitasking tasks. The display is a large 6.67-inch IPS LCD with 450 nits of brightness and a 1080 x 2400 pixel panel. According to the manufacturer, the display is shielded by Corning Gorilla Glass 5, which can withstand scratches from level 6 scratching objects like coins, keys, etc.
Regarding the camera, the Redmi Note 9 Pro Max sports a 64MP main camera on the back, along with an 8MP ultrawide, a 5MP macro, and a 2MP depth camera. A 32MP wide camera for selfies and 1080p at 30 frames per second video capture is shown on the front.
Regarding functionality, the gadget includes a large non-removable Li-Po 5020 mAh battery that may provide a backup of 1.5 days under moderate use. The phone is available in three different configurations—64GB with 6GB of RAM, 128GB with 6GB of RAM, and 128GB with 8GB of RAM—and is powered by the newest MIUI 12, which is based on Android 10.
Having said that, let’s quickly go through the instructions for rooting the Redmi Note 9 Pro Max and unlocking the bootloader after doing so. Please follow the guide thoroughly to avoid having your device enter a boot loop.
Describe The Bootloader
A device’s bootloader, sometimes referred to as the boot programme or bootstrap loader, is an essential component. It is software that a computer or smartphone loads as a custom created operating system.
A CD/DVD, hard drive, or smartphone with internal storage installed all run the programme.
What Causes a Locked Bootloader?
The bootloader is locked by the makers for the following reasons:
- Stop someone else from installing a fresh ROM.
- Prevent cracking or hacking of the device.
- Any custom recovery cannot be installed with a locked bootloader.
- OEMs bind users to use their optimised operating system by locking the bootloader.
- Locked bootloaders make it easier to apply monthly security fixes to the device.
Bootloader Of The Xiaomi Redmi Note 9 Pro Max Be Unlocked
Please follow the steps provided below; failing to do so might result in a bricked smartphone that requires expert technical knowledge. To flash a custom recovery and subsequently root the Redmi Note 9 Pro Max, the bootloader must first be unlocked.
Requirements
- Verify your model number, which has to be: Xiaomi Redmi Note 9 Pro Max (Excalibur codename)
- Your phone must have at least 70% charged; otherwise, difficulties might sometimes arise when exploring. Why take a chance? Try to completely charge it.
- Backup – Making a phone backup is a wise habit to get into if you want to root your phone or install a custom ROM. Create a backup of all of your PC’s files, including contacts and photographs and videos.
- Activate USB Debugging and read the instructions How to Make Xiaomi Devices Support USB Debugging
- Unlocked Bootloader: Review the instructions Xiaomi Smartphone Bootloader Unlocking Instructions
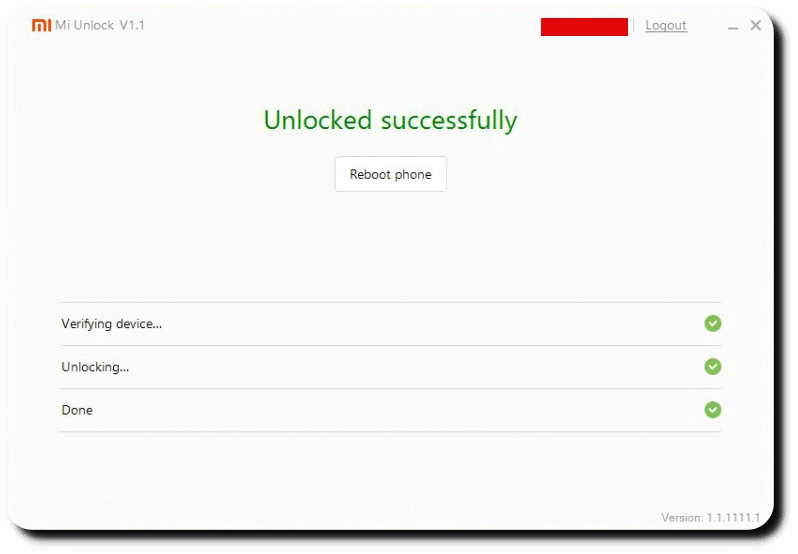
The following notification will appear on your computer screen and your Redmi Note 9 Pro Max will reboot as soon as the bootloader has been unlocked. To root your smartphone and install custom recovery, follow the following instructions.
Obtainable Files For Rooting The Xiaomi Redmi Note 9 Pro Max (Excalibur) On Android 11
- Download TWRP Recovery for Redmi Note 9 Pro Max
- Download SuperSu by Chainfire.
- Download Magisk Manager from Github.
Verify that you have downloaded all necessary files. then go on with the steps.
On The Xiaomi Redmi Note 9 Pro Max, How To Install Twrp
Step 1: Install ADB Fastboot Tools on your PC after downloading them.
Step 2: Turn off your Redmi Note 9 Pro Max. Once you see the Green Bunny logo, press and hold the Volume Down + Power buttons.
Step 3: Use a USB data cord to connect your smartphone to your computer.
Step 4: Go to C: Programme Files (x86) in step four.ADB and Fastboot should be minimised. Right-click py_cmd.exe and choose to launch it as administrator.
Step 5: At this point, open the ADB Terminal or computer’s command prompt and enter the following command:
fastboot flash recovery twrp-3.4.0-11-curtana-unified-mauronofrio.img
then enter the following command:
fastboot oem reboot-recovery
Hold the Volume Up + Power button key combination after entering fastboot reboot to boot to TWRP. Once booted, TWRP will patch the stock ROM to stop TWRP from being replaced by the stock ROM. This step must be followed otherwise the install will need to be redone.
The Xiaomi Redmi Note 9 Pro Max May Be Rooted.
Make sure to download SuperSU or Magisk Manager from the links provided in the article’s prerequisites. then go on with the steps.
You can only utilise one of Magisk Manager or Super SU, so make your decision carefully. If you’re unsure, use Magisk Manager.
Step 1: Move the downloaded SuperSU or Magisk Manager file to your Redmi Note 9 Pro Max smartphone’s internal storage or SD card.
Step 2: At this point, just boot into recovery. You have the option of backing up the Stock ROM through the TWRP interface. However, I advise backing up the stock ROM. Because you can flash the Stock ROM if the operation fails.
Step 3: Tap Install. Next, choose the “SuperSU.zip” or “Magisk.zip” file, then swipe to confirm flashing (found at the bottom of the screen). Magisk/SuperSU is now being flashed and will be finished in a few seconds.
Last Words
On the Redmi Note 9 Pro Max, unlocking the bootloader enables you to install TWRP custom recovery, which offers a wealth of advantages of its own. With a custom recovery, you may backup your existing ROM while also rooting your smartphone. Now that the bootloader of your Redmi Note 9 Pro Max has been unlocked, you may enjoy it. The Redmi Note 9 Pro Max’s custom ROMs won’t begin to be developed for a long. You may use Magisk to enjoy the modules and customise your smartphone till then.