
Windows 10 and earlier iterations of the Windows operating system are about to be replaced by Windows 11. While there are many ups and downs with the new updated operating system, the majority of us have already upgraded to Windows 11 and have adapted to the new environment. Other operating systems, like the Chrome OS, are also receiving updates with some fairly intriguing features.
As one of the lightest operating systems, Chrome OS runs smoothly on any device with 2GB of RAM. Since the OS is based on Linux, you can pretty much accomplish everything using Linux commands. The fact that Chrome OS is built on the operating system that we often use on Android smartphones and other devices sets it apart from other Linux distributions. You may also install the Google Play Store on Chrome OS, which offers a huge selection of games and apps for no cost.
As of right now, you may dual boot Windows 10 or 11 and Chrome OS with the Play Store on the same hard disc. Both operating systems must be installed, which might take a long time and need the download of certain software. We have provided a thorough tutorial on how to dual boot Windows and Chrome OS with the Play Store in this post. Therefore, let’s begin.
Dual Booting And Installing Windows 11 And Chrome Os
I should point you that this lesson contains intricate processes and a drawn-out process before we get started. Only proceed if you have experience with several operating systems. However, I strongly advise you to back up all of your important information since you never know when anything may go wrong. Aside from that, this approach won’t affect any of your Windows files.
Pre-Requisites
- It is essential to have a USB flash drive with at least 16GB of capacity.
- Brunch also needs UEFI Firmware support in order to function. There are several restrictions while using vintage BIOS, but it still functions. On the Brunch development page, you may read them.
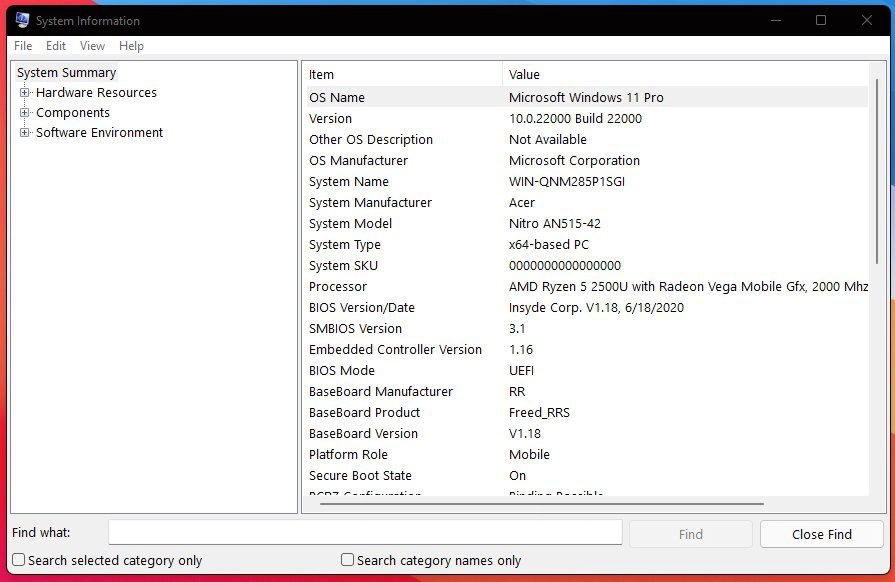
- Use the start menu search function to find System Information, then open it to see whether your computer supports UEFI or MBR/BIOS.
- To find the BIOS mode, look. Your PC’s firmware type will be listed next to it.
- commencing with the first iteration of Nehalem architecture, Intel hardware (CPU and GPU). It should be noted that ChromeOS versions higher than r81 do not support Intel first-generation GPUs.
- CPU and GPU from AMD. Support is currently limited to AMD Stoney Ridge and Ryzen CPUs.
Downloads And Prerequisites
The following items are required to flash Chrome OS onto the hard disc of your Windows computer.
1. Linux Mint
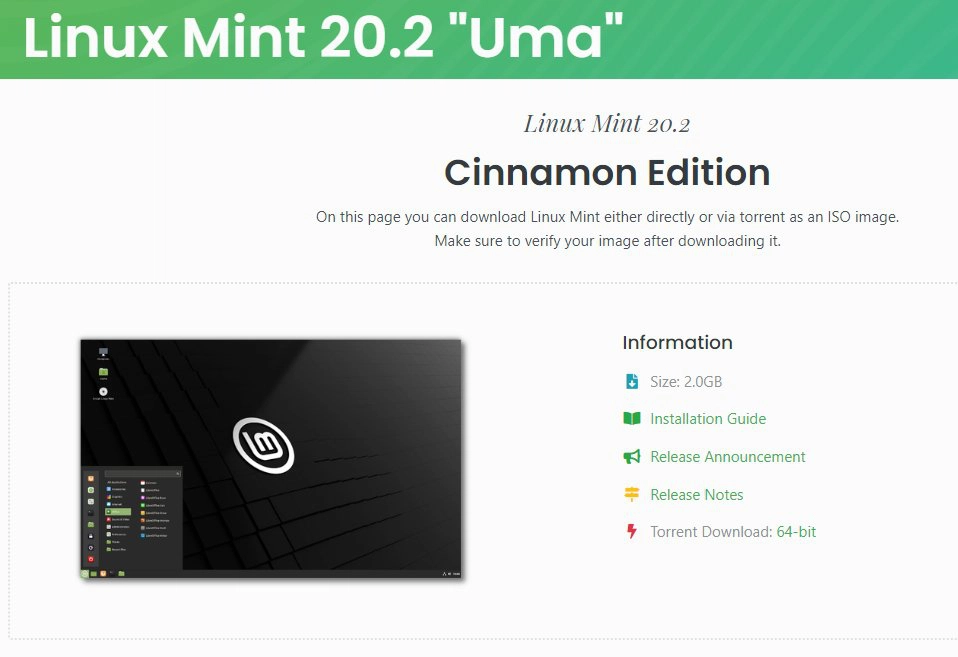
For a computer that dual-boots Chrome OS and Windows 10 or Windows 11, we’ll use the Linux Mint Cinnamon image. You may also use other Linux distributions like Debian or Ubuntu. However, since several customers reported experiencing numerous issues during installation and booting of Chrome OS, I won’t advise utilising them.
2. Rufus
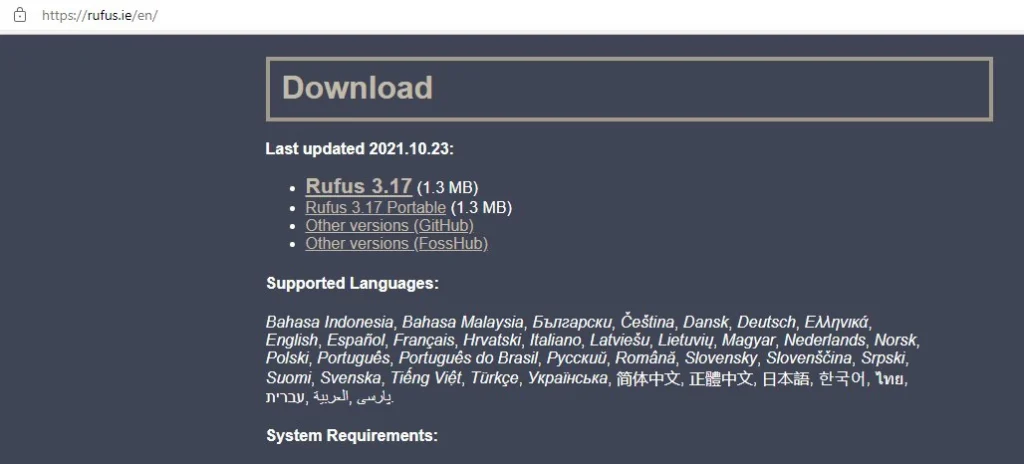
Windows programme Rufus makes it easier to make USB flash devices that can be booted from. Rufus is being used in this case to flash the Linux Mint image on the USB storage.
3. Brunch Framework

The brunch framework’s goal is to create a generic Chrome OS image from a recognised recovery image. It utilises a special EFI partition to boot from and a 1GB ROOTC disc that contains an initramfs, a modified kernel, the swtpm binaries, userspace patches, and configuration files.
Not designed for use with Brunch, certain Chrome OS scripts may at some time react badly with Brunch and wipe data unexpectedly, including Windows and non-Chrome OS partitions. You should utilise Chrome OS on a device with less important info, in my opinion.
4. Chrome Os Recovery Image
Get the official Chrome OS recovery image at this time. The download button is located below. Look for the term “rammus” when the website first loads. To begin the download, click the most recent recovery picture in the recovery column. The version number was 94 at the time this guide was being written, but it may change in the future.
Rammus was chosen since it runs on the majority of current Intel CPU versions. However, I advise you to go through the list below and download the particular picture according to your processor.
Intel Processors
AMD Processors

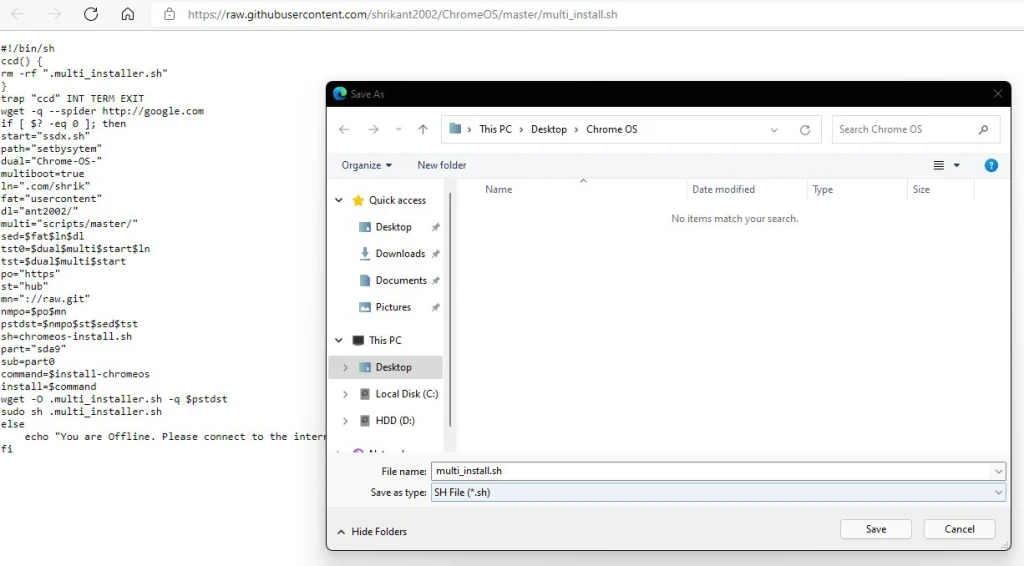
5. Shell Script
Download the multi_install.sh shell script, which enables Chrome OS to be installed on a Windows disc, last. To save the file, click the download option below and then press Ctrl + S.
Let’s start with the steps now that we have all the required files!
Streamline File Organisation
Step 1: Gather all of the downloaded files together in one location first. Let’s assume you’ve put all the files on your desktop.
Step 2: Create a folder called Chrome OS on the Windows desktop. It may also be created in any other location with enough storage.
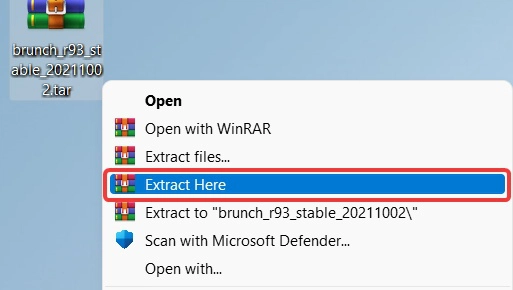
Step 3: Using WinRAR, use the ‘Extract Here’ option to extract the Brunch package. You will thus extract four files from the archive. Place these four files in the Chrome OS folder at this time.
- chromeos-install.sh
- efi_legacy.img
- efi_secure.img
- rootc.img
Step 4 – Next, extract the Chrome OS recovery image file.
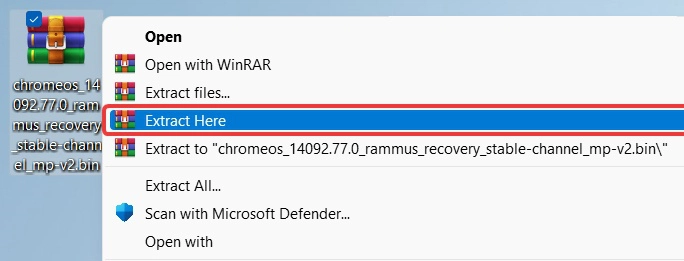
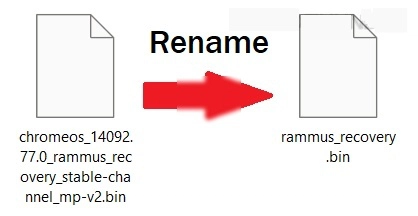
Step 5: After extraction, a file with a.bin extension will be produced. Give the.bin file a new name: rammus_recovery. Put the rammus_recovery.bin file in the Chrome OS folder at this point. Be aware that you must change any other Chrome OS images you have downloaded, such as Volteer, Grunt, or Zork, to their respective names plus _recovery.bin. For instance, the filename for grunt recovery would change to grunt_recovery.bin, and so on for volteer recovery.
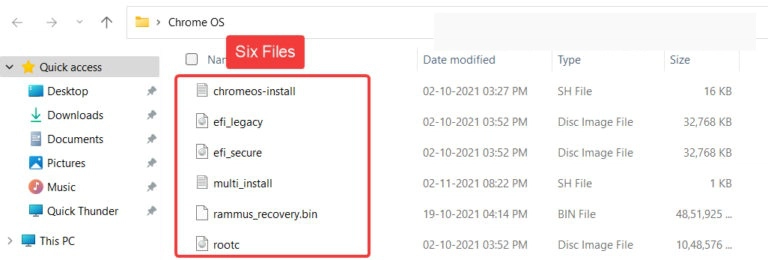
Step 6: Insert the multi_install.sh shell script file into the Chrome OS folder.
Step 7: At this point, the Chrome OS folder should include six files. Take note of the location of the Chrome OS folder since we’ll need it in the next phases.
Cinnamon Flash Linux Mint
We’ll flash the Linux Mint ISO image onto the USB storage using the Rufus tool. Because ChromeOS is a Linux-based operating system and the shell scripts we downloaded need a Linux environment to function, Linux distribution installation is required. The following are the procedures for installing Linux Mint on a USB storage device.
Step 1: Open the Rufus application after plugging in the USB storage device, such as a Pendrive or microSD card.
Step 2: In Rufus, go to Device and look for the connected USB storage. I’m using a 32GB Pendrive in this case.
- Choose the Linux Mint ISO that we previously downloaded under Boot option.
- To display your connected hard drive if you’re using a hard drive, use the List USB Hard Drives check box.
- Press the Start button immediately, leaving all other settings alone.
Please be aware that flashing the USB storage will erase all of the data on it. Therefore, before clicking Start, we highly advise that you back up all the information that is required.

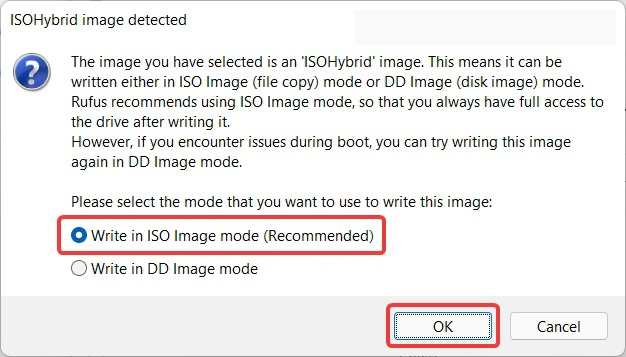
Step 3: A popup will display once you click Start. Press OK after selecting the Write in ISO picture mode option. The USB drive won’t be used for Windows operations if you choose DD Image boot. DD Image mode is helpful if you have an ancient CPU and a legacy BIOS.
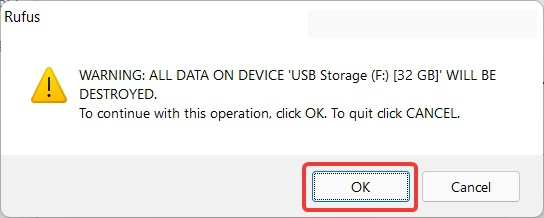
Step 4: At this point, Rufus will alert you to the fact that it will delete all the data on the USB drive we’re using to flash Linux Mint. Press OK if you have taken the backup.
Unallocated Space For Chrome Os Creation
We now need to use the Windows Disc Management tool to create an Unallocated partition. For the purpose of establishing an unallocated partition, the hard disc must have at least 14 GB or more of free space. I’ve given you 100 GB, but you may choose the size of your partition.
Let me tell you anything as a side remark. The minimum partition size for Chrome OS is 22000 MB (22 GB), followed by 44000 MB (44 GB), and so on. However, in this case, you may choose any size. Later, we will provide a suitable partition size before flashing Chrome OS with Linux Mint.
Let’s reduce the size of the current disc and add unallocated space. These are the procedures.
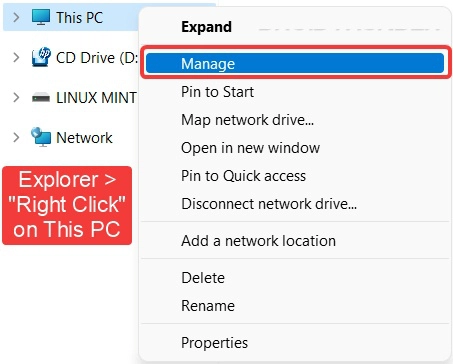
Step 1: Right-click the This PC icon in Windows Explorer by opening it. To access computer management options, choose Manage.
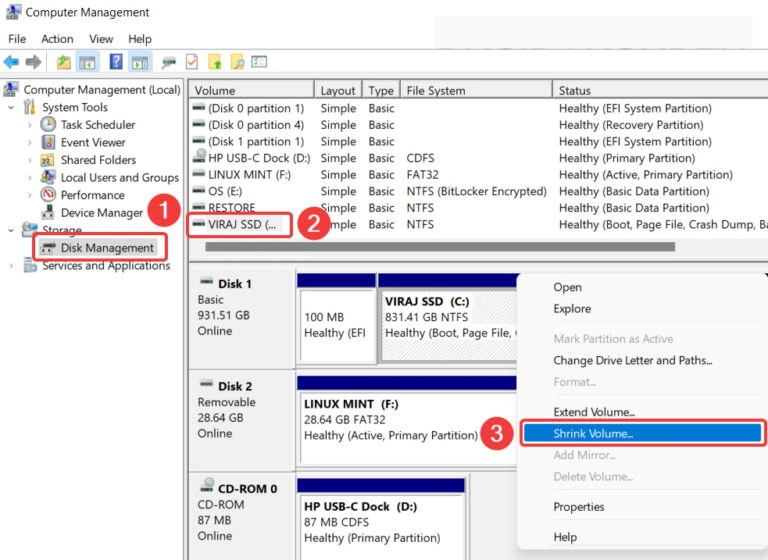
Step 2: From the left, choose Disc Management. Now choose the partition from which you wish to create unallocated space by clicking on it. To make room, I’m utilising an external SSD. Shrink Volume may be selected by performing a right-click on the chosen drive.
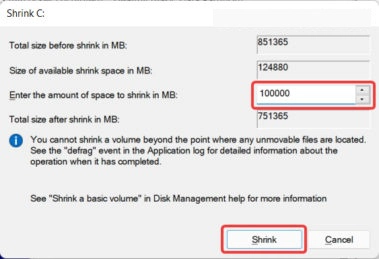
Step 3: As was said at the start of this section, I will create a partition that is 100 GB (100000 MB) in size. To continue, press the Shrink button.
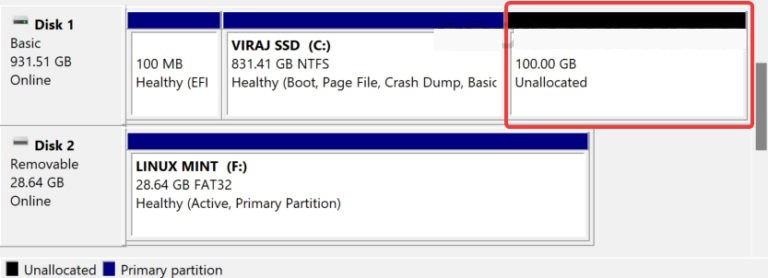
Step 4: You will now see that the unallocated space in the disc management is distinct from the chosen drive and indicated in black.
So far, so good? We have now finished all the necessary Windows OS processes. Let’s start the USB flash drive by booting the Linux Mint Cinnamon image from it.
Launch Linux Mint From A Usb Drive
We must carry out a few actions in the PC BIOS in order for Linux Mint to start up and for Chrome OS to be installed.
Step 1: Start by shutting down any running instances of Windows. Launch the BIOS menu. Start your computer and repeatedly click the F2 or DEL key on the keyboard to do that. A different key combination may be required to enter the BIOS on your computer. Find the correct key by consulting the table below.
| Brands | BIOS Key |
|---|---|
| Acer | F2 or DEL |
| ASUS | F2 for all PCs, F2 or DEL for motherboards |
| Dell | F2 or F12 |
| HP | ESC or F10 |
| Lenovo (Laptops) | F2 or Fn + F2 |
| Lenovo (Desktops) | F1 |
| Lenovo (Thinkpads) | Enter + F1 |
| MSI | DEL for motherboards and PCs |
| Origin PC | F2 |
| Samsung | F2 |
| Sony | F1, F2, or F3 |
| Toshiba | F2 |
BIOS Menu keys for various Brands
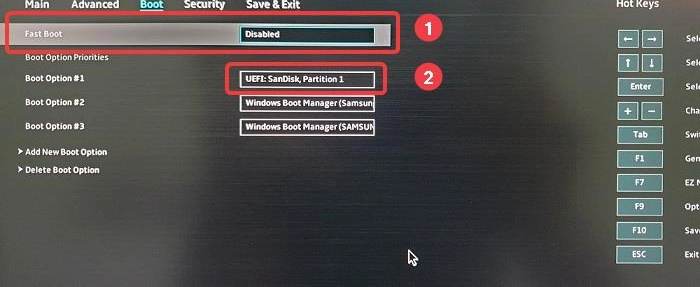
Step 2: Go to the Boot tab in the BIOS and turn off Fast Boot. Additionally, make sure CSM (Compatibility Support Module) is an option. If it’s there, be sure to change it to Disabled as we’re utilising a UFEI mode. Keep the CSM option turned on if you wish to utilise Legacy mode.
Step 3: We must modify the boot sequence in order to boot Linux Mint instead of Windows. To enable BIOS to boot our USB flash drive, move USB Storage to the top of the screen.
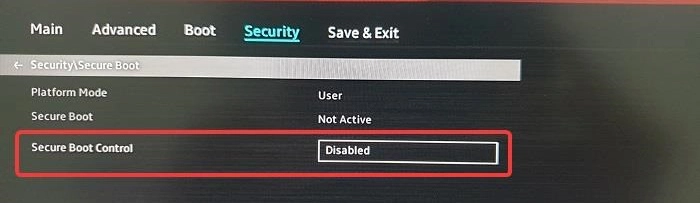
Step 4: Select the Security tab, then search for Secure Boot Control or a comparable selection. Disable it if it is currently enabled. Even after a successful installation, you cannot start the Chrome OS without removing the secure boot feature.
Step 5: To save the modifications and leave the BIOS, hit the F10 key. Your computer will restart, and the following Linux Mint Menu will appear. Enter the key to continue.
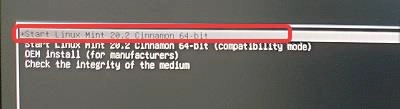
You ought to have now logged into the Linux Mint Cinnamon OS at this time.
Install Chrome Os
Step 1: use an ethernet connection or Wi-Fi to connect your PC to the Internet after you’ve seen the Linux Mint screen. In order to download required libraries and dependencies, the Chrome OS installer needs to be connected to the internet.
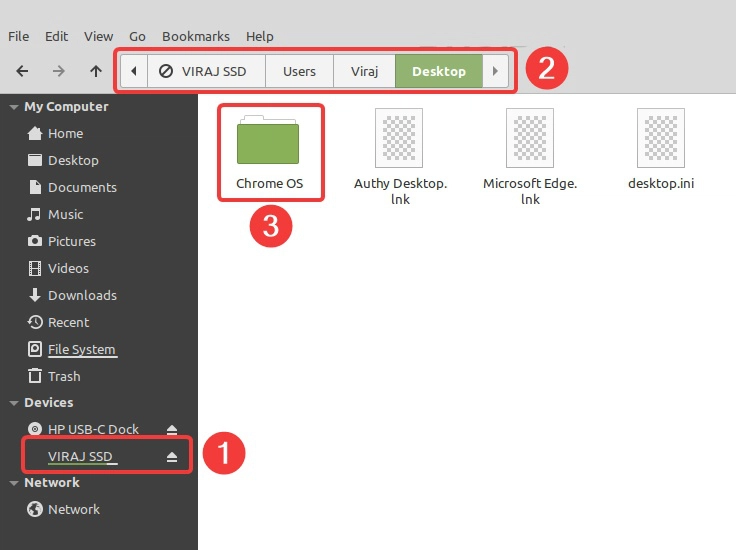
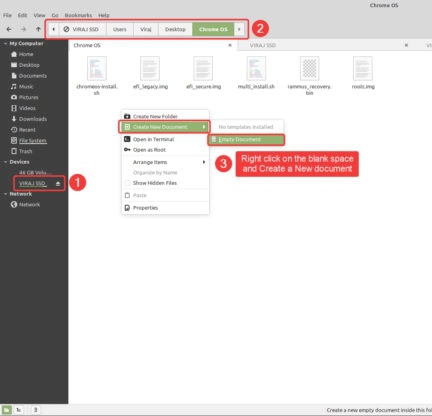
Step 2: Go to the disc where you stored the Chrome OS folder by double-clicking the Computer icon on the desktop.
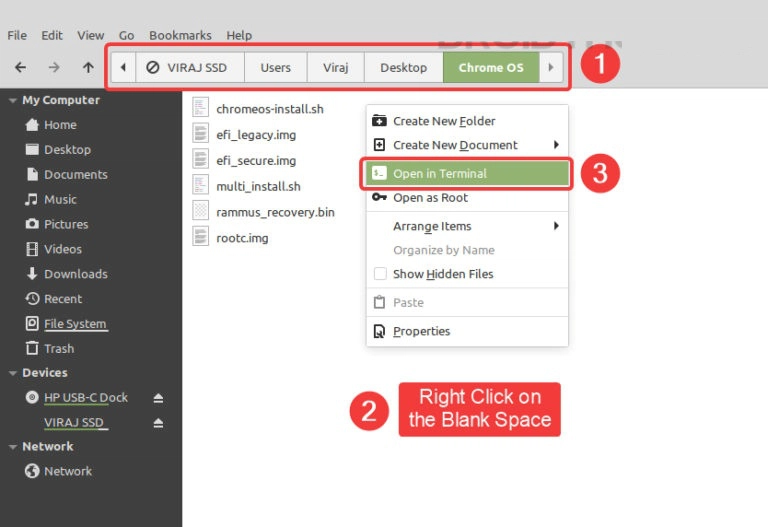
Step 3: Right-click on the white space in the document and choose Open in Terminal. The Chrome OS folder will be visible in a terminal window that opens.
The Shell Commands
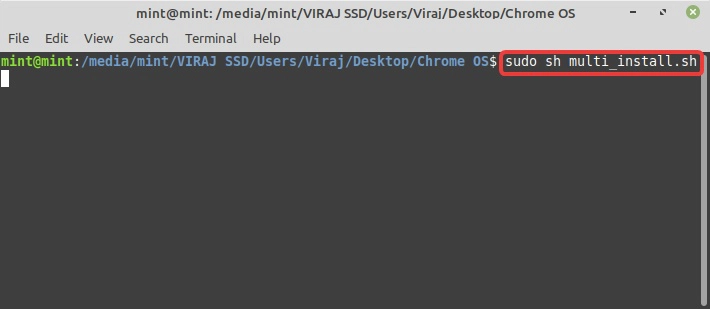
Step 4: Type the next command into the Terminal window.
sudo sh multi_install.sh
Step 5:The installer will prompt you in to decide whether to download the necessary files and carry with the installation. Y key and Enter key together.
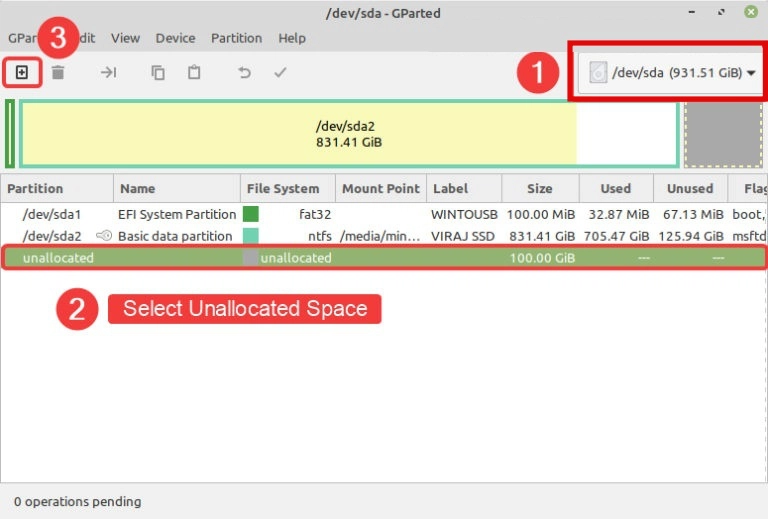
Step 6: After the installation, a window containing the Linux disc partitioning programme GParted will emerge.
- Make sure the proper hard disc is shown at the top right side if your computer has many drives attached.
- Choose the “unallocated” item.
- To construct a division, click on the + sign in the upper left corner.
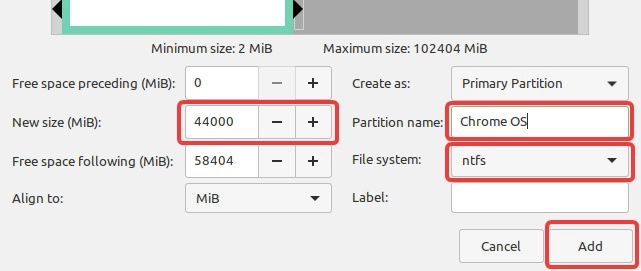
Ntfs Partition Creation For Chrome Os
Step 7: Fill out the New size field with 44000 (or any multiple of 22000). Choose File system as NTFS and enter Chrome OS as the partition name. Click the Add button.
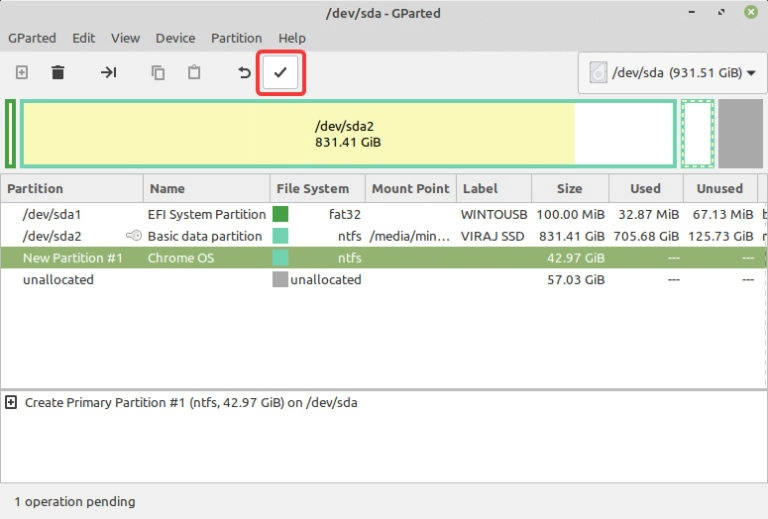
Step 8: To begin the partitioning procedure, click the check symbol at the top. It won’t even take a few seconds to finish.
Step 9: Write down the partition name since we’ll need it later. Here, my partition is sda3. Close the partition creation window at this time to allow the terminal script to continue.
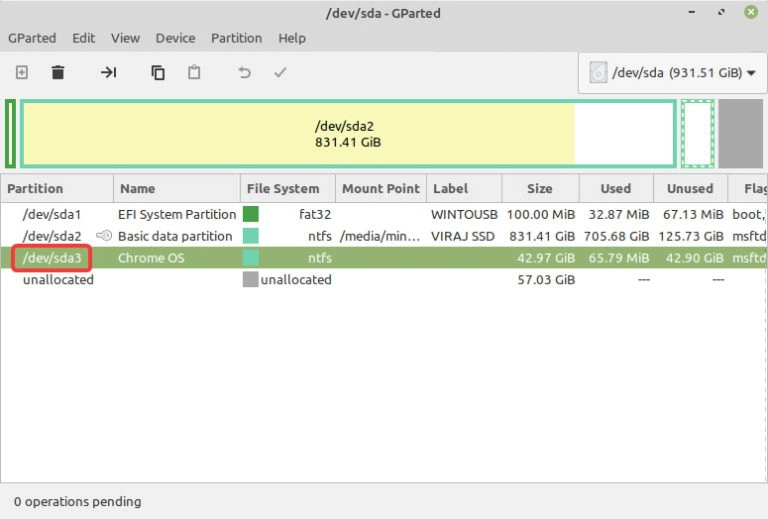
Step 10: the installer software will request the name of the partition. The one that you highlighted in the previous step should be entered.
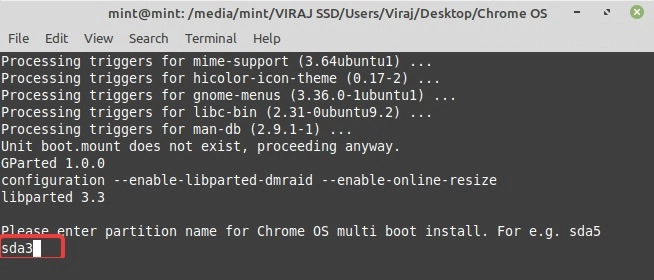
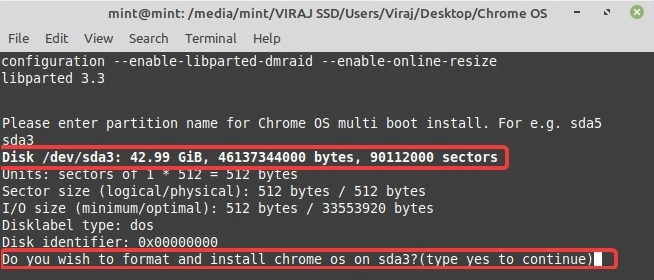
Errors In The Partition Writing Process
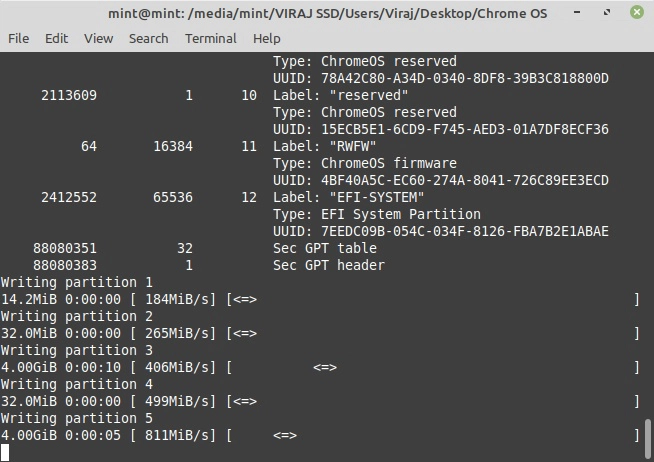
Step 11: Verify the entered partition’s name and size. It is a reassurance. Type yes and press the enter key if everything seems to be in order. You should see the progress bar arrows as the script begins to write the different volumes.
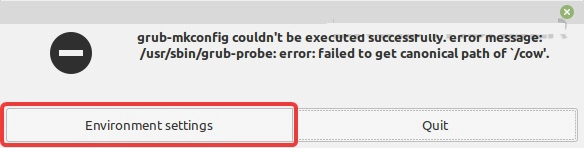
Don’t be alarmed if you see the following grub-install error: unable to get canonical path for ‘/cow’. To repair it, go to the troubleshooting section at the end of this tutorial.
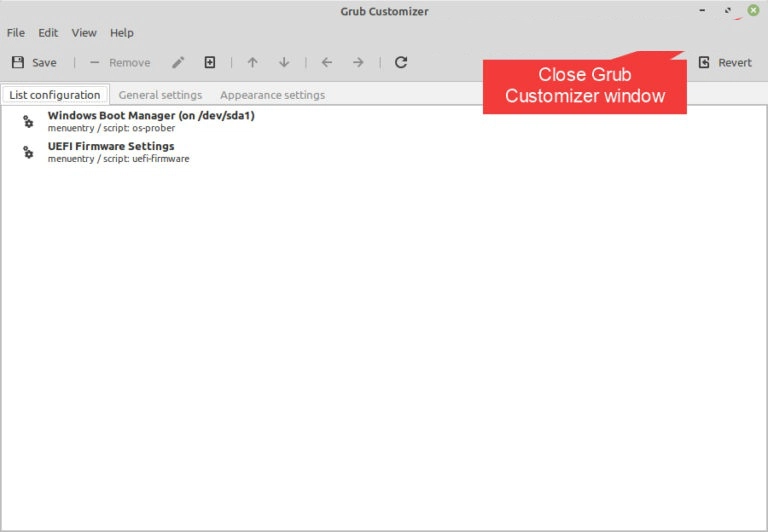
Step 12: A grub customizer window will appear when partition creation is complete. Close the window as there is nothing left for you to do.
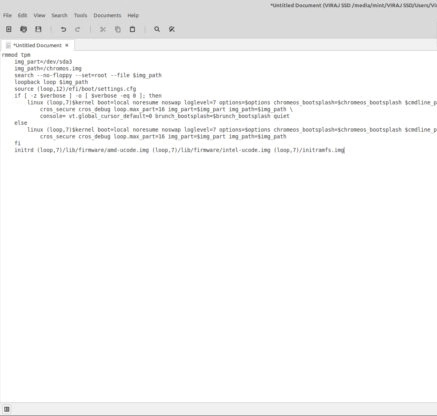
Step 13: Copy the brunch code as seen in the picture below to complete the process on Linux Mint. To accomplish that, use the mouse to select the code, then press Ctrl + Shift + C to copy it.

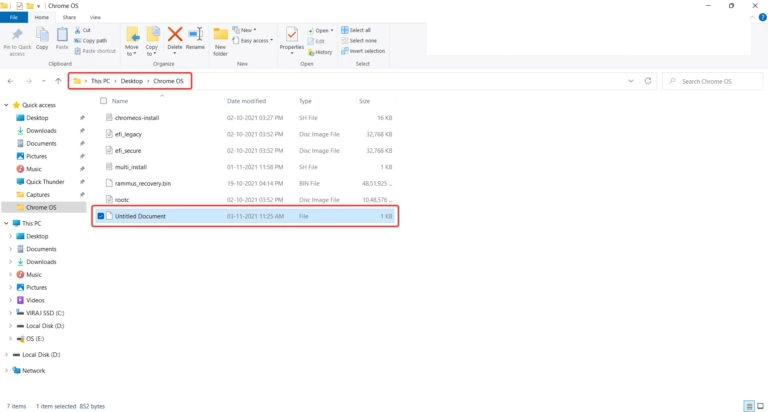
Step 14: Navigate to the Chrome OS folder. By right-clicking and choosing Empty Document, you may create a notepad file. Copy the code, then paste it where it belongs.
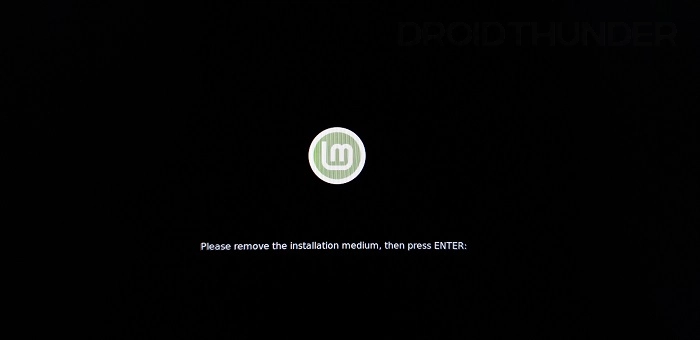
Step 15: Exit Linux Mint by pressing the Enter key and removing the USB.
Dual-Booting Chrome Os With Windows
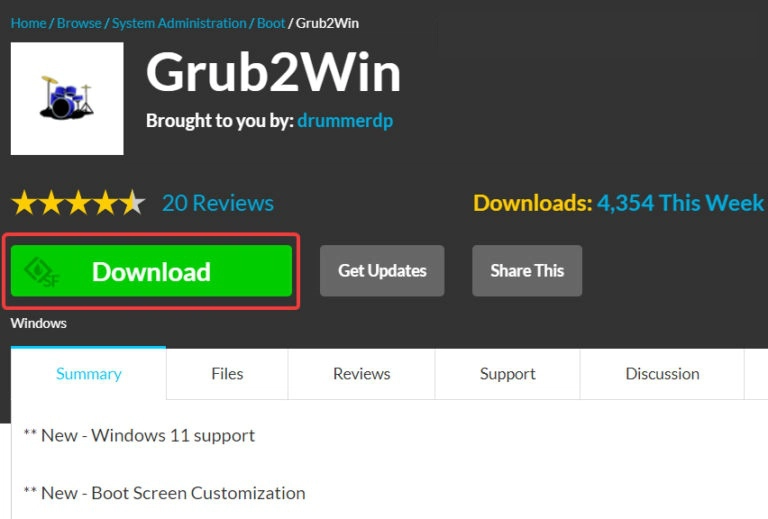
You have successfully installed Chrome OS alongside Windows; nevertheless, in order to use it, we must make it bootable by adding its boot entry. For this task, we’ll use the Grub2win programme.
Step 1: Get the Grub2Win application.
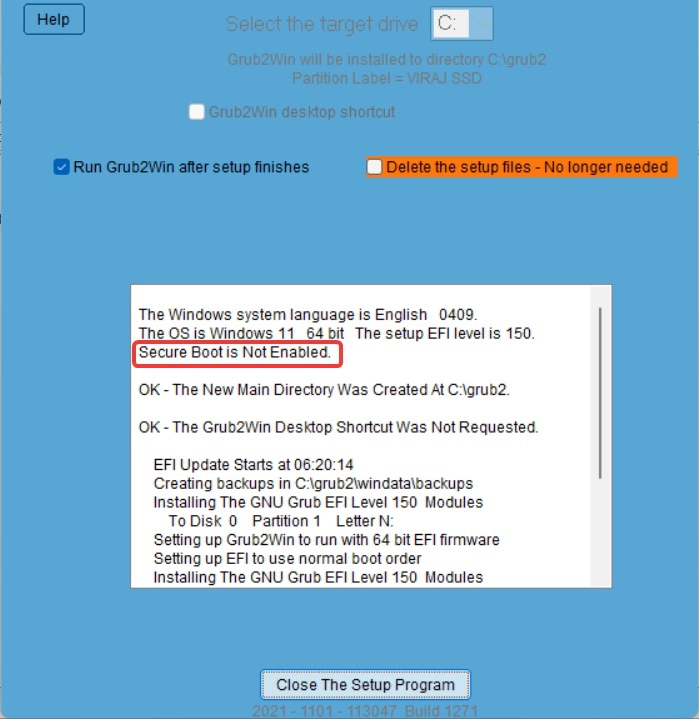
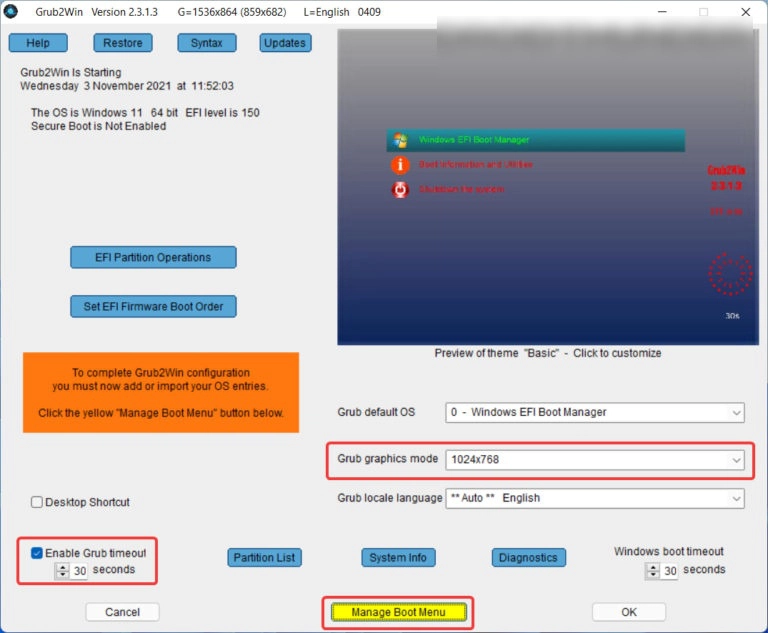
Step 2: is to open the Grub2Win programme and confirm that Secure Boot is not enabled.
Step 3: Complete the actions listed below after clicking the Manage Boot Menu button.
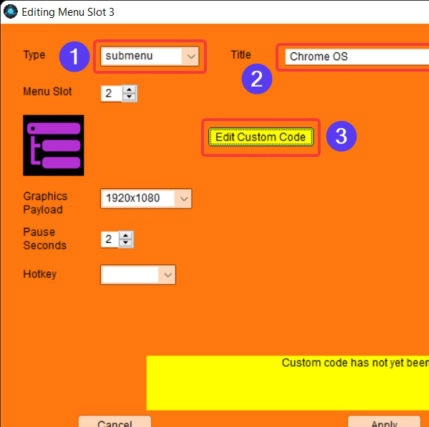
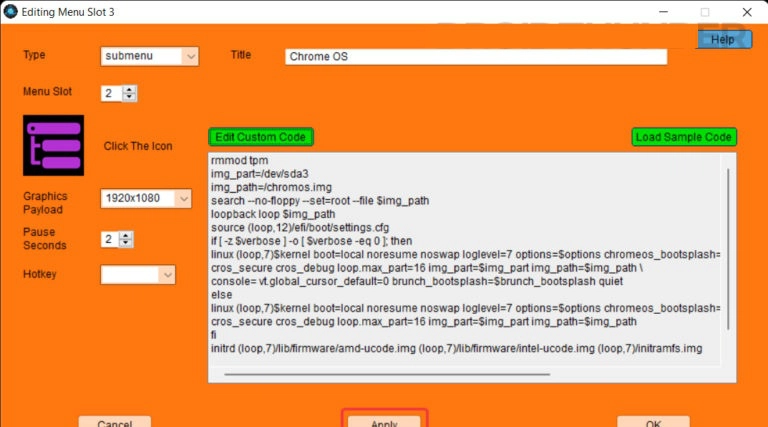
- Choose Type as the Submenu.
- Enter Chrome OS as the title.
- The Edit Custom Code button should be clicked.
Step 4: Open the text file that was saved before Linux Mint OS was shut down by going to the Chrome OS folder.
Step 5: Paste the text into the “Custom Code” box as seen below. Close the window by selecting Apply.
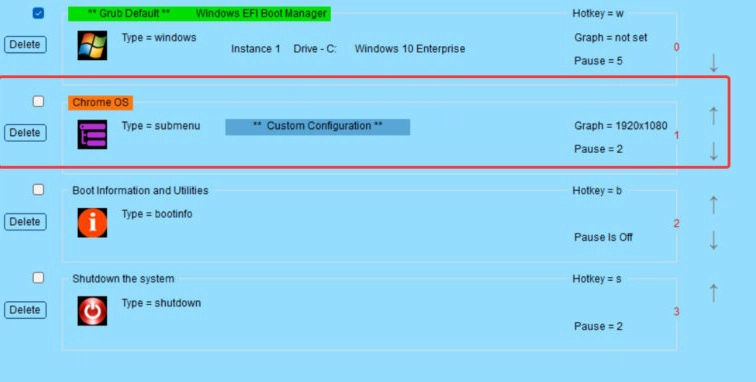
Step 6: Move the Chrome OS position up so that it is easier to pick at launch. Restart the system after closing the Grub2win programme.
Utilising The Grub2Win Menu To Launch Chrome Os
1. The Grub2Win menu will appear when the computer restarts. To choose Chrome OS as a highlighted row, depress the key.
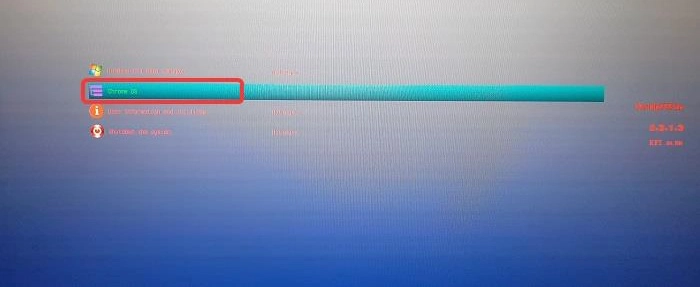
2. After pasting the code into the Grub2Win programme to create a Chrome OS boot entry, BIOS will run it, causing Brunch framework to launch.

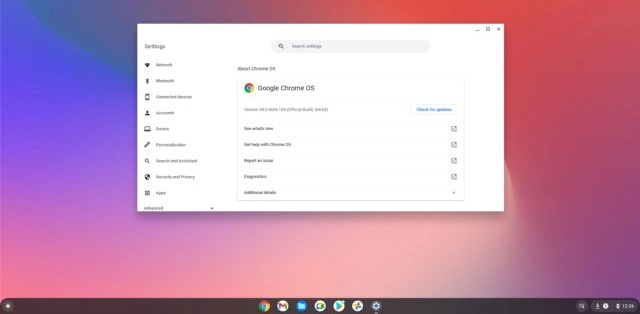
3. Hurray! That’s all, folks! The Chrome OS has successfully started up for you.
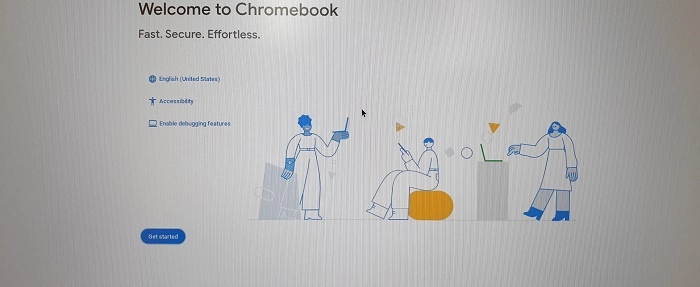
Now that Chrome OS is set up, you may enjoy using it in conjunction with a Windows 10 or Windows 11 computer. If any hardware device or WiFi is not operating on Chrome OS, go to the Troubleshoot section.
Before you sign into your Google account, keep in mind that it is forbidden to operate Chrome OS with Play Store support on unlicensed devices. You could be breaking Google’s terms of service in one way or another. Therefore, we advise using a different Google account to sign in so that your primary account is secure.
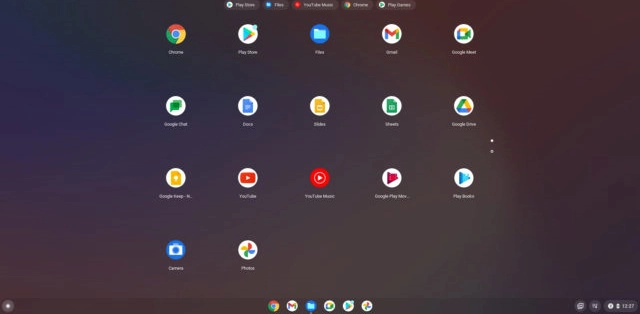
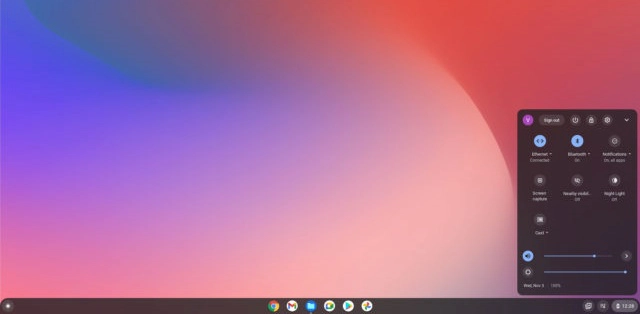
Images Of Chrome Os
Remove Chrome Os From Your Windows Computer
It takes a while to install Chrome OS on the Windows disc. But when it comes to uninstalling it, it is easy. Open the Disc Management tool after starting the Windows operating system. Locate the Chrome OS partition that we created at the start of this instruction, then choose format from the context menu.
Likewise, launch the Grub2Win programme. Remove the item we inserted for Chrome OS, then save your modifications.
Diagnostics (Revised November 2021)
1. Correct the grub-install error: ‘/cow’ couldn’t be found on the canonical path’
So you do discover this mistake, huh? That is not an issue. By entering a few short instructions into the terminal, we can repair it.
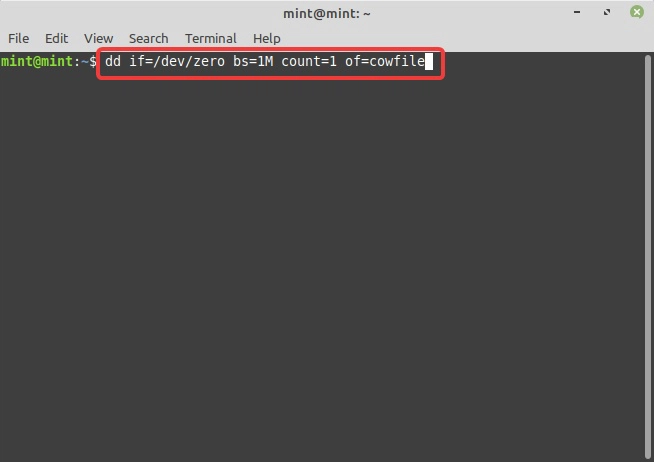
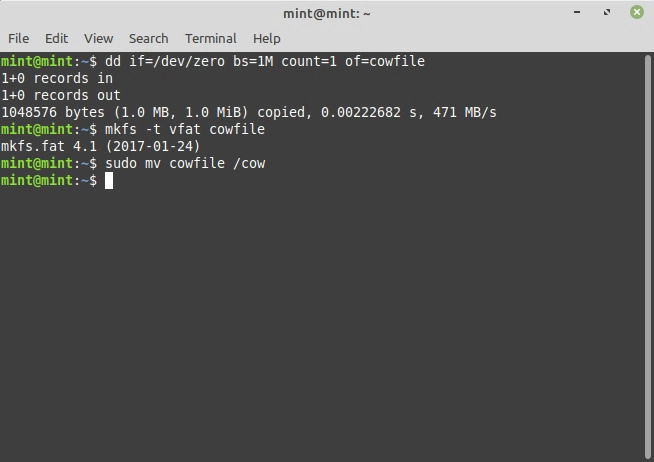
Step 1: Leave the terminal as-is as it is already running in one instance. The following commands should be entered one at a time in a new Terminal window.
- dd if=/dev/zero bs=1M count=1 of=cowfile
- mkfs -t vfat cowfile
- su mv cowfile /cow
Step 2: After completing all the instructions, shut off the second Terminal instance. Clicking on the Environment settings button will bring up a menu with many choices. Hit “apply.”
Step 3: The Grub Customizer windows will appear when the Environment settings have been applied. Just shut it; there’s nothing we need to do.

2. Resolve the Chrome OS’s WiFi, Bluetooth, and touchscreen display issues
Try utilising Chrome’s Crosh terminal if you’re having trouble with a particular piece of hardware while running the Chrome OS.
Fix The Bluetooth Problem In Chrome Os.
Step 1: To launch the Crosh Terminal, press Ctrl + Alt + T. Type the following instructions one at a time into the terminal.
- shell
- sudo edit-grub-config
Step 2: You may now add support for the hardware of your particular device. The whole list of commands may be found here. For instance, you may put “options=rtbth” (with quotes) after cros_debug and before loop.max if you have an RT3289LE or RT3290 Bluetooth device.
Step 3: To save the file, now press Ctrl + X, the Y key, and then Enter. Restart your computer, and Bluetooth should function properly this time.
The Wifi Problem With Chrome Os
Step 1: Find out who made your WiFi card.
Use the following command in the Crosh terminal for Broadcom WiFi devices.
“options=broadcom_wl“
Use the following command in the Crosh terminal for Realtek WiFi devices.
“options=rtl8188eu” or “options=rtl8821ce“
Enjoy Windows And Chrome Os On The Same Machine.
So that’s how you install Windows and Chrome OS on the same hard drive and boot from a single device with both operating systems active. For newbies, the process could be difficult and time-consuming, but if you’ve worked with Linux previously, dual booting Windows 11 and Chrome OS will be simple for you.
We’re done with this guide now. I hope you liked it! Post your comments below if you run into any problems while carrying out the aforementioned processes. We’ll do our best to assist you.